Monday, May 29, 2017

Competitor 4: Painting, Cleaning up Electronics

The Competitor 4 is now my go-to "big" rocket for flying, which was formerly Positive Ascent's role.

Even though I've flown it twice already, there was an issue with the electronics in one of the two altimeter setups (Link to first flight). A couple weeks ago, I found and isolated the intermittent power interruption. It turned out that the two piece, riveted positive terminal on the 9V battery holder was making intermittent connection. I removed the wiring from all 4 terminals, and soldered the 2 pieces together on each of the terminals. This should ensure solid continuity for both batteries, so that I truly have a proper redundant set of electronics.

Also, I never finished this rocket (it's still unpainted). There were large, ugly "flats" that resulted from the way I used tape to dam the epoxy from running off while setting up. (Link to post with fillet details.).

Last weekend, I took a Dremel tool the ends of the external epoxy fillets on the fins. Then I used an application of wood filler and sanded. This helped smooth the low spots out prior to using primer on the rocket.


I bought some fluorescent orange and fluorescent green Krylon paint for this rocket. I'd like to make sure it's fairly bright so it's easier to find on the ground (or in a tree etc...) after a flight.


I did a lot of experimenting (in MS Powerpoint) with color schemes, and I've found a few that I like a lot. I did the primer and some of the red and green over the weekend. It's not my best work, and I even had some peeling issues because I was rushing. Instead of striving for perfection, I'm shooting for making it look cool on the pad from a few feet away or more. (The "loud" colors should help distract from the flaws anyway!) Some pictures of the progress (and issues) follow.


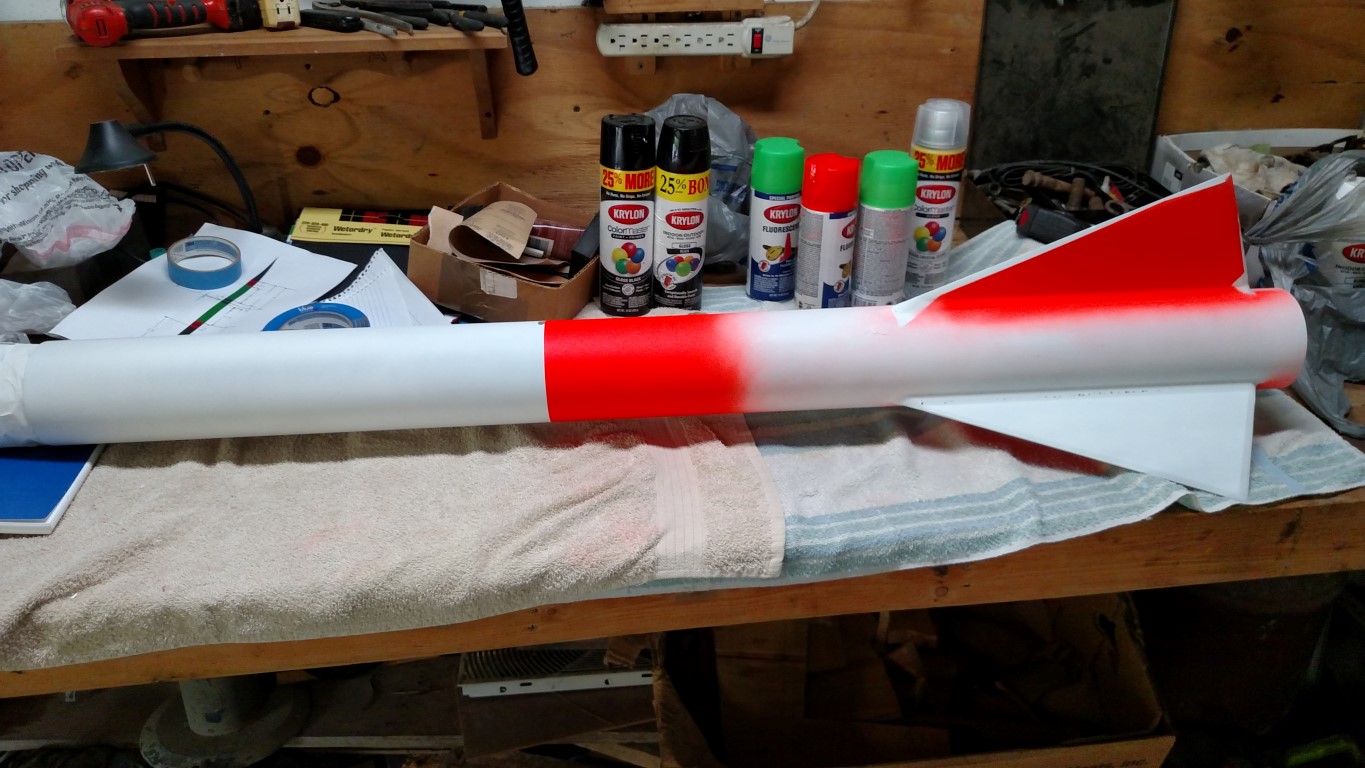
Next up will be the paint on the forward section of the rocket, and the black on the bottom half. Then there will be some black on the top part to do and clear coat on the whole rocket.


Friday, May 26, 2017

X-Calibur Updates

My Public Missiles (PML) X-Calibur. This is its 3rd paint job. It started out metallic green and purple, then it
was red and yellow, and now finally the gray and black. None of the color schemes I've done on this rocket
have looked very good to me. For reference, the rocket is 4 feet long and weighs about 2 pounds.

My Public Missiles X-Calibur was one of my first high power rockets. I built it in late middle school or early high school so it's something like 16 years old. It has many flights on it and has always been a decent flier. I intend on continuing to fly it as a "cheap" and simple way to fly G, H, and I motors. I decided to make provisions for it to use an altimeter for ejection. It will remain an apogee event only rocket, since there just isn't space in it for dual deployment.

This will be an improvement over motor ejection because there will be no calculating/ guessing delay times, and having to drill them to the correct duration. Instead, the altimeter will sense apogee and fire the ejection charge at the right time, every time.

The pictures summarize what I did to install the altimeter mount, and keep enough space to also fit a tracking transmitter (I consider the tracker an absolute must on high power rockets, so I didn't even consider leaving it out.)

Payload Bay

Payload Bay Components, Spread Out

The antenna of the tracker must go inside the nose cone in order to fit.
This is a good thing as it will keep the antenna straight and give it some protection.

This is actually the electronics sled out of the Super Weasel (R.I.P.)


Backside of the Electronics Sled


I used a Velcro strap through slots in the tube to keep the
electronics sled "clocked" properly.

This is the access to install the wire that will connect to the
 e-match and ejection charge.

This picture shows the alignment of the air sampling hole in the
payload bay with the rotary switch on the electronics sled.
On the pad I'll stick a small flat head screwdriver in the hole to
turn the switch and arm the altimeter.

This is the bulkhead of the payload bay. The drilled hole is where
 the wire will exit to connect to the ejection charge in the
lower portion of the rocket.


Summer 2017 Plans

I've decided to start flying rockets again. It's been nearly 3 years since I last flew Positive Ascent's final flight, and the Competitor 4's 2nd flight:

Links here:
Positive Ascent Flight #20 Post #1 of 2
Positive Ascent Flight #20 Post #2 of 2
Competitor 4 Flight #2 Post

I've decided I'm definitely not taking Positive Ascent out of retirement, despite the requests of several people to do so. The following are what I have planned for the short term:

1) I'm going to be finishing (painting) the Competitor 4 and making that my go-to "big" rocket.

2) I will modify the old X-Calibur to include an altimeter for apogee deployment. That will be a good easy flier that's easier on the wallet, and quicker to prepare for flight.

Separate updates on each of these efforts will follow soon.