Thursday, December 8, 2011

29mm Rocket Update

The finish on the fiberglassed body tubes was not very good. The tape wrap had a tendency to push tape to certain areas, resulting in a rippled finish. I spent several hours sanding these ripples out and the tubes are quite nice now.


The ends of this tube and a little in the middle have been sanded. The light spots show the sanded parts.

The sanded aft tube compared to the un-sanded upper tube.

Next, I marked where the fins would be glued to the tube, using a paper wrap.


I used a combination of styrene sheets and wood stock to space the fins up exactly the right height on a flat counter. I then tacked them in place with thin CA glue.


Next, I did 2 layers of tip-to-tip fiberglass on the fins and body tube.


After the tip-to-tip fiberglass, I did fillets on the fins. I used 5 minute epoxy mixed with milled fiberglass particles to strengthen the joints.


Next, I will sand the fiberglass and fillets smooth and do 1 or 2 more layers of tip-to-tip fiberglass to further strengthen the fin joints.

Sunday, December 4, 2011

29mm Minimum Diameter Mach Breaker

My next rocket is a minimum diameter, high performance mach breaker that will fly on C through I motors. The rocket is 29mm in diameter and will be around 34 inches long. It should be capable of easily achieving mach 1.5 to 1.7 on I motors and attain altitudes of 9000 to 10000 feet. It will be streamer recovery, and include my tracking transmitter, and a recording only altimeter.

Rocksim screenshots shown empty, and with the largest 29mm motor made, the I224 Classic from CTI.


The simulation data.

I started with the fins. I layed up 6 layers of 10oz./sq.yrd. fiberglass cloth, alternating the angles at each layer. The cardboard bits are mockups of the fins.

The layup, wetted out with West System's 206 epoxy.

The fin layup was clamped between 2 layers of plywood and plastic sheeting.

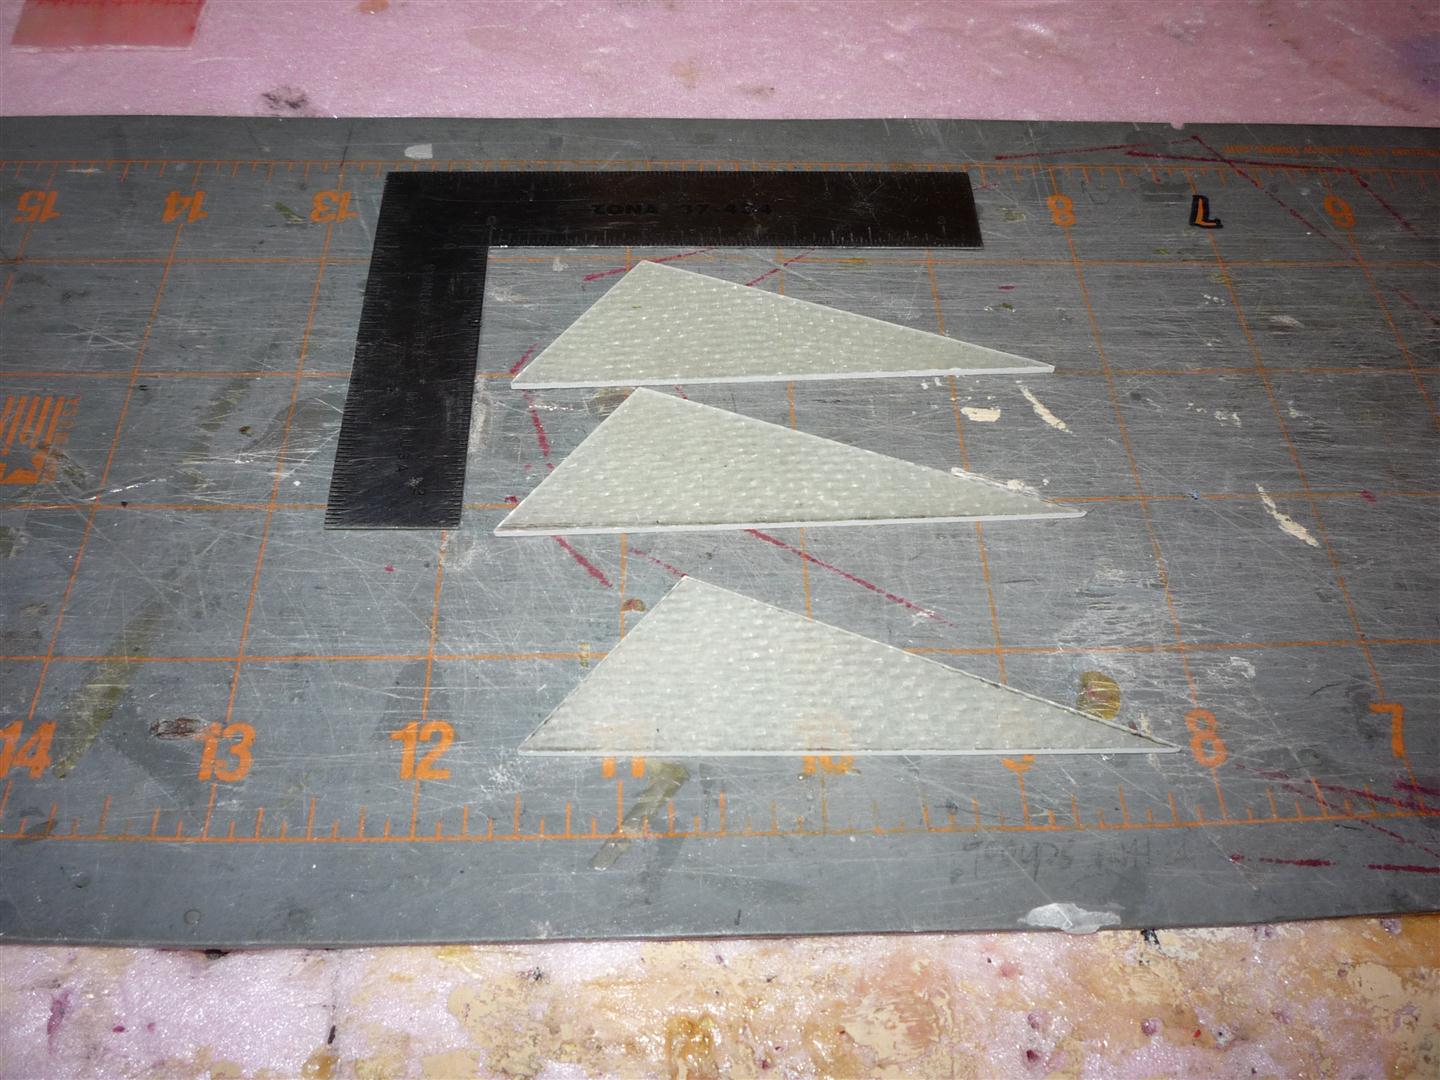
Once cured, I drew the fins out on the fiberglass.

The rough cut fins.

I sanded the edges to the correct dimensions.

Some rough beveling was done by hand.

The fins are completed here. The beveling is sharp, and the fins ended up at about 1/16th of an inch thick and weigh 3 grams each.

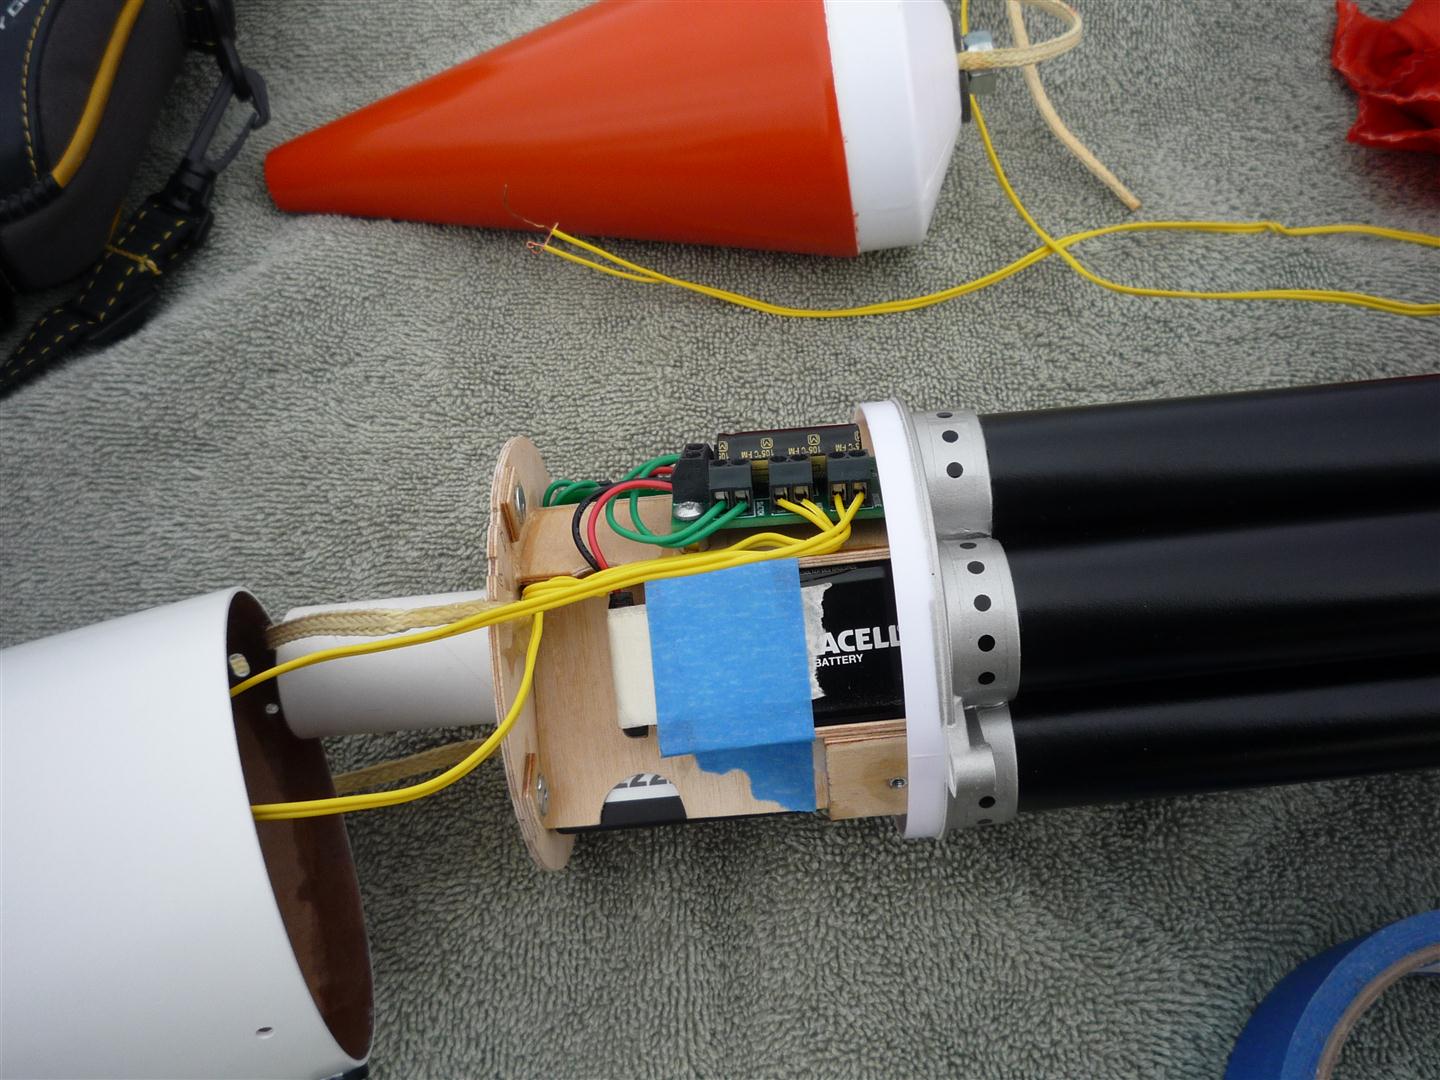
This is the layout of the parts. I did this to figure out where to cut the tube. The motor case is the CTI Pro29 6GXL case, the largest 29mm commercially made. The caution tape will work well as the streamer. I have removed the tracker from its case to allow it to fit into the 29mm tube. The paper cutout shows the length and width of the altimeter I will get for this rocket, the Pnut from Perfect Flite. I will be custom turning the coupler tube and nose cone from balsa.

Here's the nice clean cut at the separation point of the payload bay. To do this, I used a paper wrap as a guide, and then built up a layer of masking tape. I used the masking tape as a guide to cut against. I placed the  motor case inside the tube to prevent the tube from crushing while cutting.

I bought some light, 1.5 oz./sq.yrd. fiberglass cloth to glass the body tubes and to do the tip to tip fiberglassing of the fins.

I peeled the shiny, smooth layer from the tubes to allow the epoxy to soak in. I cut the fiberglass wide enough to wrap around for 2 layers in one session.

Once wrapped, I rolled some plastic sheet around the tubes and did a tape wrap of electrical tape. This squeezes the fiberglass nice and tight against the tube and squeezes extra epoxy out, saving weight and making the tube stronger.

The finished booster tube.

The fiberglassed payload tube.

Next, I will be removing the tape wrap and doing some filling and sanding of the fiberglass. I will also be ready to attach and reinforce the fins.

Monday, November 28, 2011

Rubicon's 1st Flight and Crash

LAUNCH VIDEO

The "up" part of the Rubicon's flight was perfect, reaching an altitude of 856 feet. Unfortunately, the drogue parachute got severely burned and did not open. An open drogue would have been necessary to pull the main parachute out to slow the rocket sufficiently for a safe landing. The following pictures sum up the preparation and landing pretty well I think. I am just very relieved that all the electronics survived the crash. It was a fun project but I will not be rebuilding this one. That just means it's time for a new project.


All 3 outboard igniters installed. Still have to be secured.

Wiring is secure and the rocket is ready to go to the pad.

Ready for launch.

The crash site. Look close and you can see the rocket to the left of the road.

Note the tightly melted together drogue parachute on the ground.


At least all engines lit and those annoying fins survived.

Shattered nose cone. It had about 8 ounces of weight in it for stability so it hit very hard.

The "core sample" as it's called.


Wednesday, November 23, 2011

Rubicon Is Ready for Its First Flight

The Rubicon is finally finished, just in time for the Black Friday weekend sport launch with the newly established club URRG. The first flight will be on an Aerotech F35W reload and 3 Estes E9s. The F35W will get it moving nice and slow off the pad and should take it to about 300 feet. At approximately 2 seconds into the flight, right at the burnout of the F35W, the timer will ignite the 3 E9s to continue a gentle boost for another 3 seconds. Apogee should be somewhere in the 800 to 1200 foot range.

I used both Krylon and Rustoleum white spray primers and the entire model is finished by airbrushing Model Master/ Testors acrylic paints. As usual, I did hours of filling with Elmers wood filler and sanding to fill any imperfections in the spirals of the tubes.


The fins are scratch built with 1/16" ply and fiberglassed on both sides. Here, they are layered in wood filler and ready for sanding.


This is what the fins looked like after many coats of primer, wood filler, and sanding.

I mounted the fins using 3mm hardware with button heads.

Everything was ready for paint in this picture.


Painted and stickered.

I fabricated these to mimic the fin mounting tabs on the opposite sides of the fins. They are .100" Polystyrene.

(The masking tape is still in place from painting the silver)