Monday, June 24, 2019

Competitor 4 Flight #6, CTI M1101 White, URRF 6

The M1101 flight in the Competitor went off perfectly on Saturday (6/22/19). It was an impressive launch, reaching 13,400 feet and 880 mph (Mach 1.14). Both of these figures shattered my previous records. Thanks to Clare, Sean, and Bob for supporting this flight!

Some interesting points/notes:
  • The performance shattered expectations, which were based on Rocksim simulations, which I have dialed in well for subsonic flights. I had to change the Cd from .56 to .44 to achieve an accurate performance prediction for this flight. (I believe using my Cd override value from the previous 5 subsonic flights also overrode the software's calculation of supersonic flights. When I let Rocksim calculate the drag for the simulations, it was fairly accurate for the single supersonic flight, and less accurate for the subsonic flights.)
  • The rotation nearly stops while the rocket was supersonic. It clearly points to the difference in subsonic vs. supersonic aerodynamics.
  • The rocket was above Mach 1 for about 3 seconds (from 3.5 to 6.5 seconds)
  • 13,400 feet was high enough where the usual 1.25 gram drogue charge was noticeably weaker than at 6,000 feet
  • The rocket was nearly a mile upwind at apogee.
  • No one saw the rocket at all after motor burnout until the main fired over 3 minutes later.
  • The new swivel from Onebadhawk Rocketry seems to have helped to reduce the drogue shock cord from spinning up.
  • The 4" x 40" streamer seemed to work well for a drogue. Descent rate was 75 feet per second.
  • The main descent rate was about 25 feet per second.
It was quite breezy so the angle at the launch pad was critical for landing in the field. Fortunately, we got it right and it landed just 1500 feet away. Unfortunately, the wind dragged the rocket a long way through the muck field and made a small crack in the forward end of the booster tube.


Motor Built, Ready for Final Assembly

Ready for the "BFR" Safety Inspection.
(The nose cone is not in place so that I could arm the GPS at the pad and conserve battery.)

Ready for Launch


A Pic with Sean (Thanks for the help!)
The Perfectflite SL100 Data.
Note the non-smooth nature of the ascent curve. This is due to rapid pressure changes during the Mach transitions.

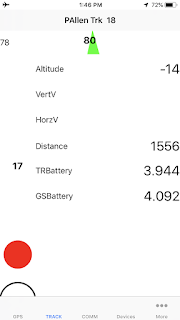
A Screen Capture of the GPS Tracking at Landing
Trail from Getting Dragged

Nose Cone Landing
(Note the rest of the recovery team at the edge of the brown part of the field.)

Wednesday, June 19, 2019

3D Printed Parts on the Competitor

I did another iteration on the GPS mount which I first showed here.

The new one fully contains the 900 MHz GPS telemetry antenna, and the overall length is significantly less by incorporating the battery into a pocket. I also put a channel and pocket to cleanly tuck the wires away. I'm much happier with how this version came out.


I also permanently mounted the camera shroud. I'm happy with how that turned out as well.


Saturday, June 15, 2019

Competitor M1101 Flight Preparation: GPS, Some 3D Printed Accessories

With an upcoming M1101 flight planned in the Competitor, I decided to make some upgrades to the rocket. I'm expecting about 12,200 feet altitude and Mach 1.10.

I decided to upgrade my tracker. Previously, I was using the Com-Spec directional system, which works well but it's limited to only giving you a direction and relative signal strength.

I bought the Featherweight GPS System. This system has a GPS module in the rocket which communicates to the ground station on the 900MHz band, which in turn communicates via Bluetooth to an app on my phone. This system will allow me to know exactly where the rocket is before even setting out to go recover it.

I designed and 3D printed a nice mount for the tracker to install into the Competitor's nose cone.
Featherweight GPS and Battery Installed in the Mount

GPS Mount Installed in Nose Cone
(The bulkplate secures it when installed.)

I also finally made a proper camera mount. So far, I've only ever used packaging tape to secure the camera, but I wouldn't trust that for a supersonic flight. I designed and 3D printed a shroud. It is secured to the airframe tube with a singe sheet metal screw, and a copious amount of JB Weld. I sanded the paint off the tube in the area to ensure a secure bond was obtained.

Sanding/Scoring the Tube
(I actually did most of the area that is covered by
the shroud, but I didn't take a picture of that.)

The Mobius Camera Mounted in its Shroud